Advanced File Recovery Advanced File Recovery
  • Home WH Home Bl Home BLC Home
  • Features
  • How it Works
    USB Drive Recovery SD Card Recovery Hard Disk Recovery Recycle Bin Recovery
  • Do's & Dont's
  • How To's
    Get Your Files Back After Emptying Recycle Bin Recover Corrupted SD card Files Recover Delete Unsaved Powepoint File Recover Deleted Music File Windows
  • User Guide
  • Buy Now
  • Contact Us
Download NowDownload Now
  • User Guide
  • Get Started
    • How to install Advanced File Recovery?
    • How to Purchase Advanced File Recovery?
    • How to Activate Advanced File Recovery?
    • How to Update Advanced File Recovery?
    • User Interface
      • User Interface - Advanced File Recovery
      • Getting Familiar with Buttons
  • How to Use Advanced File Recovery?
    • How to Use Advanced File Recovery?
    • Recovering Data from Existing Volume
    • How to Perform Deep Scan?
    • Previewing Scan Results
    • Saving the Recovered Files
    • Using Filter Options
  • Supported File Formats
  • Frequently Asked Questions (FAQs)
  • About Advanced File Recovery

Home / Help / How to Use Advanced File Recovery / How to Perform Deep Scan?

How to Perform Deep Scan?

After running Quick Scan, if you cannot find the deleted or lost documents, images, audio, or video files, and archived files we suggest running Deep Scan. This scan type thoroughly scans the selected drive and helps locate data that you could not find with Quick Scan.

1. Launch Advanced File Recovery.

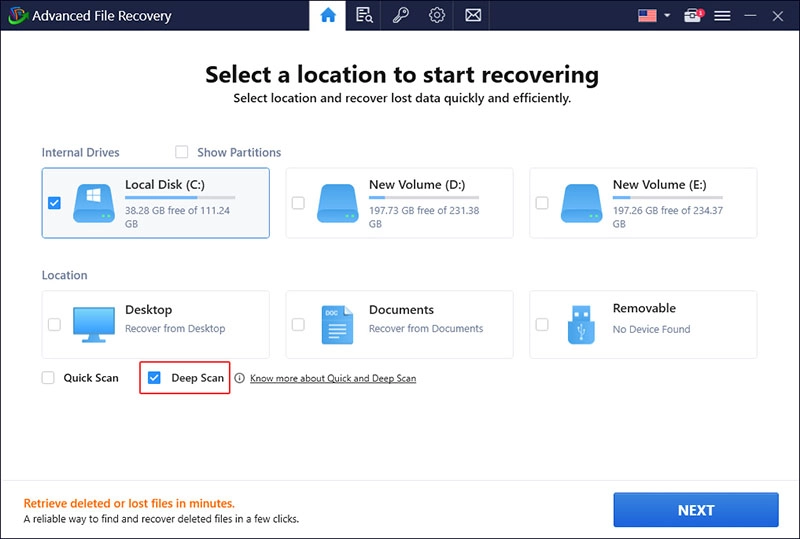
2. Select the drive to scan (internal or external/removable) from the home screen.

Select the drive to scan

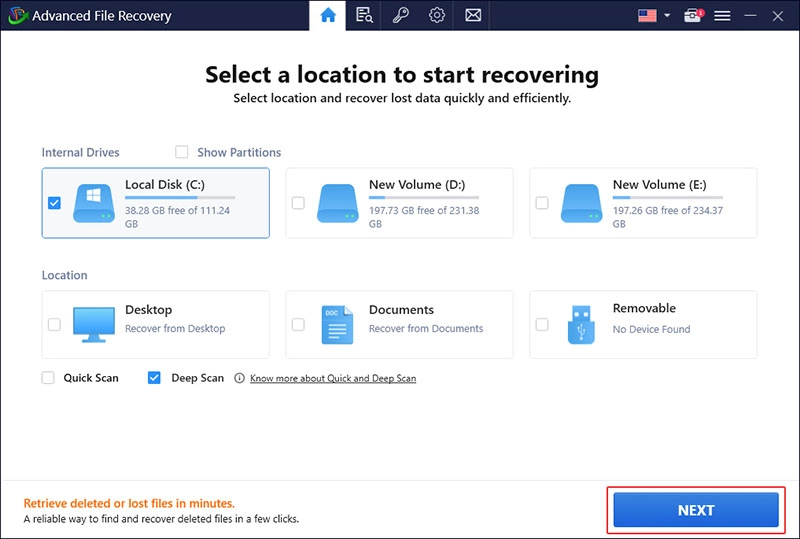
3. Select Deep Scan from the bottom left of your screen.

Deep Scan

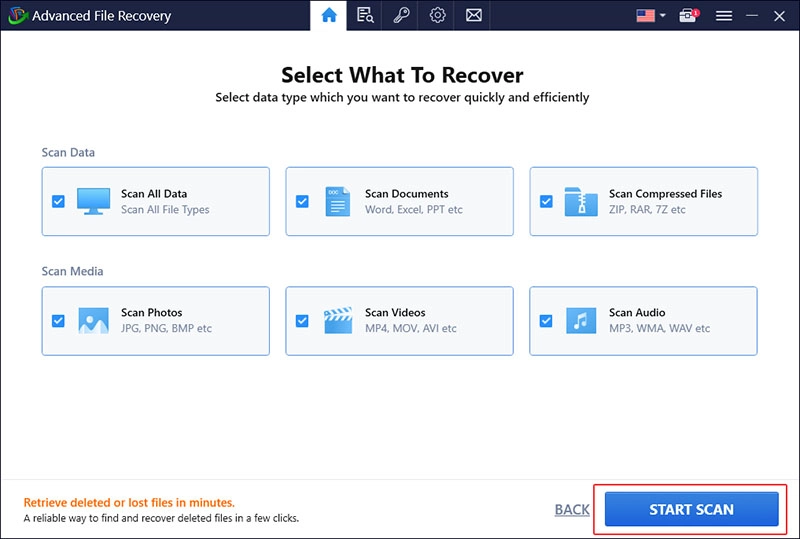
4. Click Next to select the data type you want to recover.

to select the data type you want to recover

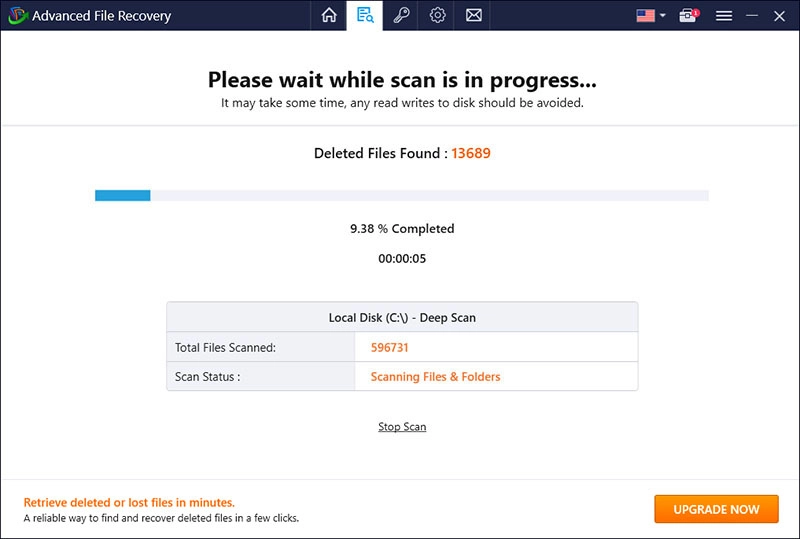
5. To run the scan, click START SCAN.

click START SCAN

6. Wait for the scanning to complete.

Depending on the disk size and deleted data, Deep Scan will take time to finish the scan.

Wait for the scanning to complete

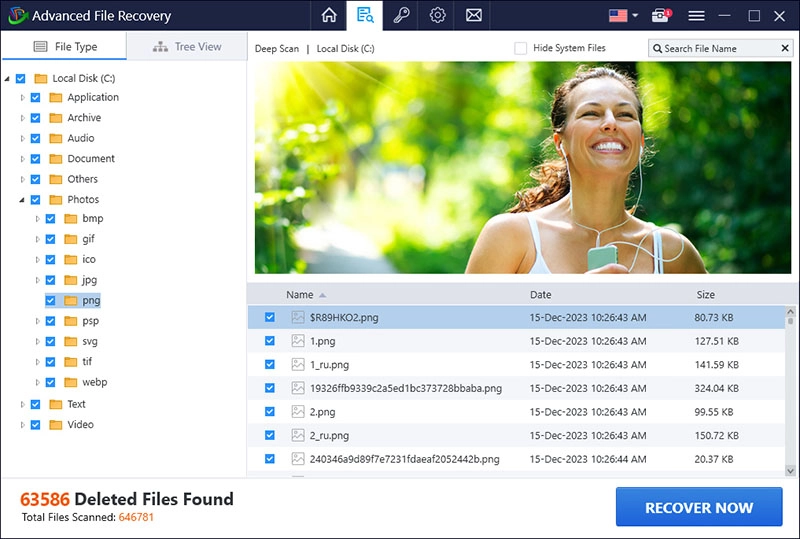
7. Once done, you get a list of all files that can be recovered using Advanced File Recovery.

All the scanned documents, images, audio, or video files and archived files are selected. To manually make the selection, uncheck the ones you don't want to recover.

Preview the file to make a better decision.

Preview the file to make a better decision

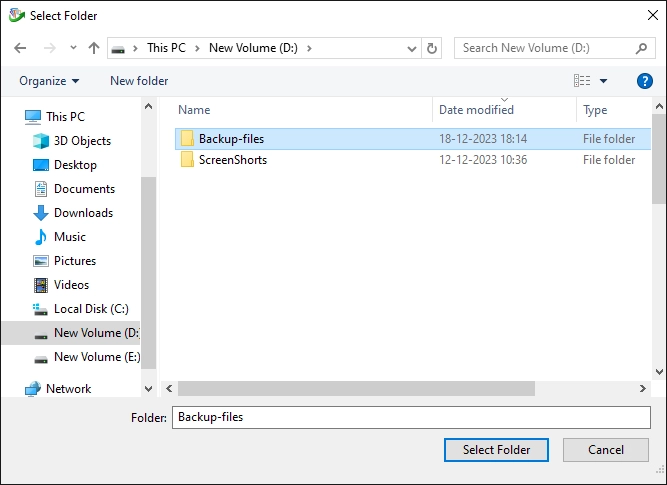
8. After selecting the documents, images, audio, or video files and archived files to retrieve, and before clicking RECOVER NOW, register the product. Once the product is registered select the location where you wish to restore the files.

Tip: Never save recovered data on the disk partition from which it was deleted. Doing so minimizes the chances of additional file recovery if you lose it again.

Doing so minimizes the chances of additional file recovery if you lose it again

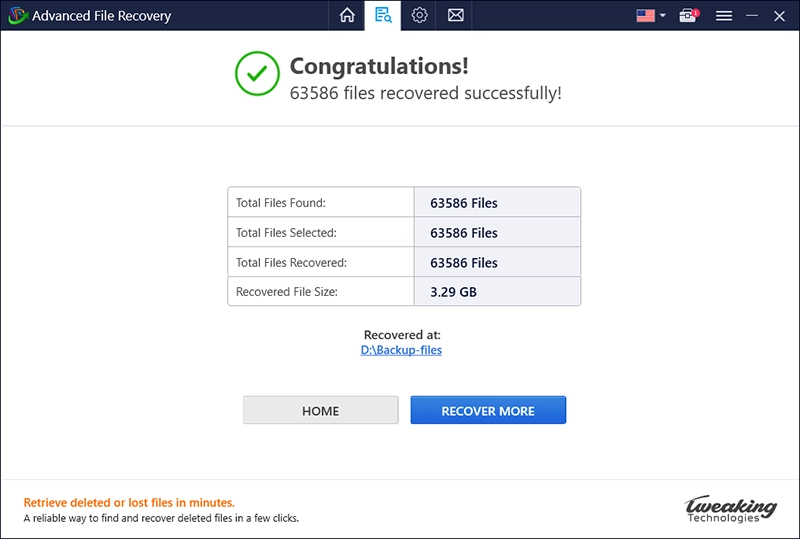
9. Once the files are retrieved, you will get a summary of the action performed.

Note: You can select only one hard drive partition at a time for recovery.

You can select only one hard drive partition at a time for recovery

  • Home
  • |
  • Faqs
  • |
  • Privacy Policy
  • |
  • Refund Policy
  • |
  • Terms of Use
  • |
  • EULA
Copyright ©  Tweaking Technologies   All rights reserved.
This website uses cookies to ensure you get the best experience on our website. View Privacy Policy
OK